Your Ad Here

Saturday, February 27, 2010

Making music on your I-Phone


A staple on the chip scene for many years - Nanoloop the creation of Nintendo Gameboy programmer Oliver Wittchow has now become avaliable on the I-Phone.

Nanoloop is a sound editing and sequencer application by Oliver Wittchow released in 1998 for the Gboy, allowing the user to create sequences that can be played on the device without a need for external hardware devices.

I have myself been a fan of chiptune for a long time and even run a monthly chiptune night in Ireland (Probably the only monthly chip night in the world... it's that niche).

I will be writing up a tutorial for nanoloop & also for lsdj in a forthcoming blog.
But for now check out this wonder.
Do you have kids on the bus / train / on the way to work annoying you with Akon played through there crappy tinny phone speakers?

Now you can fight back with loops that NEVER END.

The synth is the same old awesome piece of kit as it was with the Dmg gameboy but with some twists.

Available synthesis types are:

- rectangular wave with filter
- FM
- LFSR noise generator

Rectangular wave and LFSR sound similar to the Game Boy's and other console's soundchips but offer more fine control and additional effects (lfo / envelope for pulse width or filter, simple phaser for noise).
The FM synth is the simple type with two sine wave oscillators, with fixed base frequency and variable modulator frequency. An envelope / LFO can be applied to modulation amplitude or frequency. For a sweeping spatial effect, the modulator can be slightly detuned, with inverted phase for left/right.
Each synth channel is two-voice polyphonic and a stereo effect can be applied.

If your lucky enough to own an I-phone i suggest you make your way here. 


EAYB2WUPYU3J

Start up software to get into producing your own music


I'm going to compose a list here of software that will be helpfull in getting you on your way to writing your own music on your computer.

First up I will include my most used software, DAW's and VST's.
I will also post up some of the other software other people find popular.
If there is demo's too, I will post links to them, Just click on the name of the software to get the demo.
It's up to you to find the "full version's" so dont ask!!

Ableton Live 8 for PC & for Mac.
Native Instruments Massive for PC & for Mac.
Ohmforce Predatohm for PC.
Ohmforce Ohmboyz for PC.
Roland Edirol HQ Home Orchestra for PC.
Native Instruments Reaktor 5 for PC & for Mac.

If you haven't got yourself a pro asio soundcard yet, You can grab yourself this driver software which emulates the software on professional audio soundcards: Asio4all. It will be better than your current driver.

Other popular DAW's on the market are:

Propellerheads Reason for PC & for Mac
Logic Pro 9 for Mac.
Renoise
Pro Tools (More for analog).
Acid Pro
FL Studio (The DAW previously known as fruityloops) for PC.

Logic Pro is meant to be amazing with the new quantize functions in 9, There beat mapping and time stretching is second to none also.

Though i'm thick headed, Think I will stick with Ableton Live.

Mastering Limiters


A Master Limiter VST plugin is specially designed to boost the overall level of your final mixes, but is also highly useable on very dynamic instruments. With just one control on the front panel operation is as simple as it gets; just turn the Threshold down and hear how your mixes gets louder and louder. Very high compression ratios can be obtained without changing the balance of the mix.

To me the only limiter that matters is iZotope Ozone. There up to level 4 now.
It also has a lot more on its mind than limiting, Its an all in one mastering suite.
I suggest you "aquire" one as soon as possible to really give your productions a gleam that can be seen from the moon.

Grab yourself a 10 day full demo here.

How to write lyrics for your tracks (A few tips)


Sometimes vocals on tracks can sound awfull, Painfull and laboured.
(Listen to anything by Eric Prydz or Avril Lavigne).

Here is a few tips for you to write lyrics. Hopefully it will stop you writing a big lump of Simon Cowell dustbin pop with a kickdrum over the top.

1. Select your topic. It can be anything you want such as a breakup, a current relationship, a bad day, angry, stuff or how much you like weed.

You can write whatever pops into your head but try to be original.
Remember, it doesn't have to always be depressing. It could be some rhyme about an island in the tropical sea or you could "dirty" it up.

2. Choose a melody. Sometimes its better to write your tune first then decide if it actually needs lyrics.

3. Write at least five verses (and you don't have to use all of them) and a chorus (or two). Those are the most important parts of the song along with the melody and are the easiest to write. The verses normally have the same melody and so does the chorus. When you get the basic stuff down you can start messing with it after.

4. Write the middle eight. This is one of the hardest things to write. It usually has a different melody than the rest of the song and is usually short. It should be cool.. always cool.

5. Write the last two verses. These are normally the hardest to write, and even the most experienced song writers have run out of inspriation by then. If you're getting stuck, write down a couple of ideas and then see what you can make out of them... Remember also, You don't always have to rhyme.

6. Record you or a friend singing your song, Your friend may be better.

7. Play your track to a few mates that will give you an honest opinion of your writing.

8. Record it!

If you want some tips on recording your vocal you can check out my earlier blog on choosing a mike and microphone placement here.

Benga Bass Tutorial


Dubstep man of the moment shows how he gets his ripping big basses with his software.
Grab yourself a midi keyboard, Crank your speakers up and stick your learning hat on.
If we had more producers making this kind of bass, Commercial clubs could actually take note.

God I hate the charts.......


Part 1:


Part 2:


Part 3:


Now go make something rumble!!

DMC Champion DJ Rafik Performs on Traktor Scratch Pro


This is totally awesome, Check out this video of what you can do with Traktor Scratch Pro.
I had Final Scratch when it first came out, When I was first making the move from decks toward laptops.
It was a nice stepping stone to going fully with my laptop.
Though I have to say watching DMC legend DJ Rafik I want to go and buy myself 2 1210's!


How to make a time stretch effect like Aphex Twin

Everybody loves AFX, You can't write electronic music if you have never heard of him.
(Unless you are Basshunter or Eric Prydz.... shudder).

Here is a video on how to recreate that sound in Reason, But the same rules apply in whatever DAW you choose to use.

But remember, Don't just emulate the AFX sound, Learn it and develop on it, There is too many copy cats!


Glitch v1.3.05 updated - Download Here


There has been an update to the cool multi FX Vst Db Blue's Glitch,
This Vst is a pretty easy way of getting instant Autechre ish sounds from your productions.

It is also a pretty much a cheating way of writing breakcore and Idm but if you tweak the parameters enough and then bring it into a decent sound editing software like cubase of soundforge you can make some decent freaky cuts.


It's a free Vst and you can download the full version here.

Just drop the .dll file into you Vst plugin folder and your good to go!

Abl2 bassline tutorial


Here is a video for a tutorial on the Abl2 bassline. (A near exact replica of the legendary Roland 303)

The legendary silver box which is hallmark in electronic music has been recreated in AudioRealism Bass Line.
Analog modeling techniques have been employed to create a DSP-algorithm that accurately emulates every aspect of the original Bass Line, from growling basses to hollow middles and beeping highs with metal rattling accents.

Patterns are composed in a similar fashion to the original Bass Line using the integrated step sequencer with easy to use manipulation functions such as transpose and randomization.
The pattern analyzer is a tool for editing and analyzing patterns. In further aid to help users transition their original patterns into ABL an audio detection algorithm has been devised.
Thats right - Bass Line can create patterns using audio files as a source. How does it work? The original patterns are recorded under certain conditions, then simply hit Detect from wave and select the audio file. ABL2 will create a pattern resembling the audio input.

Main features:

- MIDI Learn function now displays all mapped CCs
- Load multiple patterns at once
- Preferences dialog for easier setup
- Pattern section buttons are now MIDI assignable
- ABL2 imports the following file formats: RBS, PH and PAT
- PNG support for easier user skinning
- All ABL1 features remain


Here is the tutorial:


If you want to try a demo out you can grab it here.

Make a huge bass in Tone2 Firebird tutorial


This is a pretty cool tutorial for use with the awesome Firebird.
I dont think it can handle itself as well as Native Instruments Massive,
But with some decent FX layered on top of this, Maybe the Predatohm or another shredding distortion, This would be pretty huge.

Making a dubstep bass sound with Simpler

Here's another good link I found on youtube.
It's not really synthesising your own bass sound as it uses samples instead of modelling, But still pretty good!!


This was made by the guys at Dubspot.

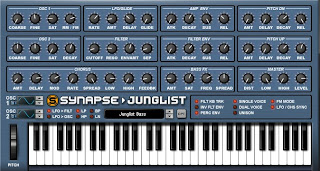
Gabba Kick Drums in Junglist VST


In this new tutorial I'll show you how to make a Nustyle Kick in Junglist.

Step 1: Basics

The first thing to do is load Junglist up, and choose the 'Dirt Kick A3' preset.

Step 2: Waves

You will see 2 types of wave symbols, now turn the 1st wave to wave 5 and leave the other as it is.

Step 3: Amp Envelope

Now we want to give the kick a longer tail - to do this we need to change the sustain and make it a little longer, so put the sustain to about halfway, and turn the release up just a breather.

Step 4: Master Section

In the master section of Junglist at the bottom right hand side turn Dist to around 3/4 this will give a little distortion to our kick.

Step 4: Layering

You'll notice that your kick it hasn't got that impact this is where the layering comes into place, so export the kick as an audio file and load it up in Cubase (or your favourite sequencer!).

Next import yourself a new kick sample that you feel is adaquate and has a nice clicky punch. Our next stages will be to add EQ, Compression and add a little 'Datube' (Or Similar plugin) distortion.

Now you'll need to import another copy of your Junglist kick into the sequencer and layer the two copies perhaps adding a filter on only one of the copies of the kick with your EQ and Compression. I'm using Step Filter for mine, here are the settings:

Settings for filter:

Base cutoff - 15
Base resonance - 50
Glide - 0
Output - 100%
Mix - 74%

You'll want your filter set exactly in the middle, between your highpass and lowpass. Next you are going to put a little EQ, Compression and maybe a little Quadrafuzz on your second kick to give it a bit of crunchiness. These are very subjective techniques so experiment and find out what works best for you!

M. Spacey

Sidechaining in Ableton Live


Now we have got to a stage where you want to write a killer track but want that pro touch?

Welcome to the world of sidechain compression.

This beast is the pro touch for any good heavy track you have heard in the last 10 years.

What sidechaining actually does is "duck" one frequency around another note which is also being played on the same frequency.
A lot of the time you may hear "mudiness" in your productions, This could be because
of a clash of 2 sounds within your mix e.g the bass & kick drum.

You may also find that your kicks are loosing power in your tracks as soon as the bass is introduced in the track.

With the help of sidechaining you can retain the raw power that your track should have.

Right, Start off with a kick drum in Live.
Write an un-complicated pattern with the kick and rename audio 1 to "Kick".


Next up we want say a bassline that is of a simular frequency to the kick pattern we have, Insert this in the track next to it and rename it "bass".


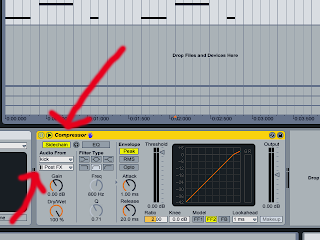
Now if they are around the same frequency you will notice the kick OR the bass is lacking in power, So lets grab te compressor from Live's sidebar and drop it onto the "bass" channel. Then click on the arrow next to the "on" switch, You will see it open out into more parameters.


Next up click on the sidechain button, Then underneath that click on where it says "audio from" then go to "kick" in the drop down menu.
This means that the output level from your kick drum is going to be "injected" into your bass track.


Next up click on the EQ button to activate it, Then underneath that click on the "low shelf" eq button.


Now play your track as you have it so far, Then go to the sidechain compressor
on the "bass" track and reduce the "threshold".
The input volume you see there in the green is coming from the "kick" channel.
And the threshhold is basically how much your bassline will "duck" around the kicks.
Thus removing the mudiness!!
Insta-boom!!

If you want to find more info on what the other functions on a compressor do read my blog on compression tips here.

How to make a Modular Synth in Reaktor


Here is a short but pretty sweet video I found on youtube to help you get to grips with the basic parts of Reaktor.
Reaktor is an insanely powerful program that can really put the wind up your productions.
Favoured by the likes of Dj Surgeon & Tim Exile it really adds a touch of class.

Synth Programming


You've bought or "acquired" a synth. You're looking at it. You've played with the basic sounds & presets And you're wondering, now what?

You have two options here. You can stay huddled with the masses,
happy to play on the presets, using the same noises & synths that everyone else does. Or you can break out into a better territory, learn how to put your own sounds together and make new and fresh sounds that sound nothing like anyone else.
(this makes WAY better & less annoying tracks).


Knowing how to put sounds together isn't about being clever. It's more about giving yourself a whole lot more time for learning.
Instead of being stuck with the original factory presets you'll be able to turn your synth into anything you want it to be.
And if you have one of the more upmarket modelling synths, you'll have an endless supply of full-on custom sounds to spread around your tracks. You'll also be able to tweak the sounds that are there already if they don't quite fit with what you're working on.
The easy and foolproof way to do all this is to cheat. Either buy some new sounds or download them from the Net, You can find a lot of user libraries online if you want extra presets for you weapon of chice.

Of course, if you take this route, you're still stuck with someone else's idea of what sounds good. Some sets of sounds are excellent - better than the factory
sets in fact - but even so, it's still incredibly useful to know why they're good and perhaps how to modify them to suit a different context. (reverse engineering someone else's synth preset can teach you loads).


So what's involved in creating sounds? You need to know two things. The first is a brief idea of how sounds work in general. The second is an understanding of how the bits inside a synth - and all the knobs and sliders - control the different aspects of a sound.
Start with getting to know how sound works. Any sound or group of sounds, whether it's a butcher chopping meat, a beer can stood on or 190bpm gabba track, its made up of three things.

Firstly there's pitch: high trebly noisey tweaks at one end and low floor-shaking bowel busting bass at the other. Most sounds have a definite pitch.
Some, like waves, don't.
Some are halfway between the two, with a sort of hint of pitch, like the sound of the wind.
Next there's colour. Colour - sometimes called 'timbre' in the books - is the quality that lets you tell one instrument from another, even though they may be playing the same note.

Imagine an expensive acoustic guitar, and a
cheap electric. Play the same note on both and the pitch is identical. But the tone is completely different. Similarly a note on an oboe and a flute sounds different; different enough to be able to tell one instrument from the other.

Finally there's loudness. This is basically just volume; the difference between loud and quiet.

All of those three things will tell you all you need to know about one moment in the sound's life. But real sounds evolve and change, either slowly between notes or rapidly during the course of a note.

Pitch can be wobbled (wub wub wub) to create tremolo. Or it can
glide between notes, instead of changing instantly. This is often known as portamento (acid stylee).

Colour changes rapidly when you pluck a note on a guitar; the sound starts sharp and bright and then quickly fades to something much more mellow. And - if you think of that same note again - the volume changes quickly too, with an initial quick attack and then a slow fade to silence.

In terms of longer changes, sounds can fade in and out and become brighter or more mellow with respect to the other sounds around them. Colour is also tied to how hard you press, pluck, blow or otherwise get a noise out of an instrument; usually the harder you do whatever it is you need to do, the brighter the note.


The real dealio


So how does a synth go about controlling and manipulating this vast universe of sound? Well, quite easily actually.
Inside every synth you'll find a collection of boxes that either create raw sound or shape it in some way. Some boxes work with sound directly. Some boxes control what other boxes do.

Overall, it's the settings for each box and the way they're linked together that create the final sound. The more boxes there are, and the more settings they have, the more complicated and interesting the sounds you can make with them. (this includes dropping other vst FX over your synth).

The simplest synths to program are also the most popular. They're called analogue or sometimes analogue modelling synths because they're based on original synth design ideas, but updated to use your computer instead of transistors. A lot of synths you cant even tell the difference from the original to the vst).


An analogue synth sound starts with one or more oscillators. On their own, these sound a bit basic; a kind of annoying moped engine sound.
If you play the keyboard, the buzzing changes in pitch. There's usually some kind of
octave setting, which controls whether you get bass, mid or treble moped sound.

On most synths there's a range of ways you change the colour of this basic buzz. You can switch between what are called waveforms and the names of the waveforms come from the shapes you'd see if you watched them in an oscilloscope.


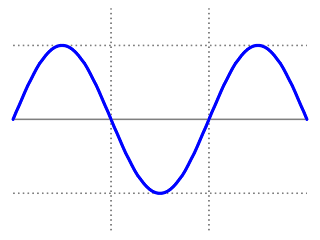
A Square wave


The classic waveform is the pulse, but as you can manipulate soundwaves, there are
variations on the shapes.
Usually a synth provides some or all of the five basic waves: sawtooth, square, pulse, sine or triangle, or variations on them. (NI massive lets you flutter between 2 at a time with each osc).

Each wave sounds different:

- Sine and triangle waves sound pure and flutey, because of the equal climbs and falls between the peaks and troughs.
- A sawtooth wave, with its gradual climb but sudden drop gives a full-on bright rasp.
- A square wave is literally on then off, so its wave shape looks brutally, er, square. It produces a mellow but bright sound.
- Pulse - if it's available - looks like and sounds similar to sine, but in place of the low troughs, it has level plains.

On some synths, it can be made to shift using a trick called 'pulsewidth modulation' which produces a slow sweeping effect that adds interest to the sound.

Extra sounds

On some synths there are different variations on these basic shapes. You might get two or three saw waveforms, perhaps based on the sounds of different antique synths.
Better synths have two oscillators. You can detune them, so they don't play at exactly the same pitch. This fattens out the sound or - at extreme settings - makes it out of tune. Some synths have more than two oscillators, which gives you an even fatter, heavier sound.

After the oscillators, you'll find a mixer section which controls the level of each oscillator. Often here you'll find an option to add 'noise' which is basically an unpitched rushing or rumbling sound. (You can find white noise etc, I'm still looking for the "brown sound").

So far, what we've got sounds kind of scary, in a brainwashing scene from a bad 60s spy film kind of way. You've got a constant rasp or buzz, perhaps filled out with rushing or rumbling. It may be quite a rich-sounding rasp or buzz, but it's still too basic to listen to for long periods.

The filter option


So next comes the filter. This takes some of the rasp or buzz away, and optionally adds some famous synth acidy squelchy goodness. Filters do a lot to make the character of the final sound appealing or not which is why people go on about them so much.... they are important!!

The most important control on a filter is a knob marked Cutoff. The filter acts a bit like a gate which you can open and close. When it's fully open the sound comes through unchanged. As it closes more and more of the treble part
of the sound gets filtered out. (depending on your cosen filter).

It's a bit like the 'Before' and 'After' photos you see in those ads for men to "increase your size".

Before the filter process, the sound is pretty rough , and
after it's clean.

When the filter's fully closed you typically won't hear anything much, apart from perhaps an occasional bassy thump (awesome for doubling up osc's to make HUGE bass). In between you get the raw sound of the oscillator(s) with some of the brashness removed. And, of course, it almost goes without saying that you don't have to leave the filter at one single position. That's ow the "acid" sound is made, By tweaking.
By moving the filter from fully closed to fully open the sound gradually changes, and if you do this during a track, you get the classic filter sweeps so beloved of the rave generation.

Following on from the filter is an amplifier. This controls final volume, in the usual volume control way. But it's also where the loudness curve of the sound is shaped, using a different section of the synth, which we'll get to in a paragraph or two.

Full effect

Finally, most synths have some built-in effects to fatten up the sound some more. These add shimmer, space and depth to the finished result, and they go a long way to making the sound appealing. If you turn them off on just about any synth the result immediately sounds lame.

I'll talk about FX in another blog. For now it's enough to know they're there and they're important.

Time and space

That's an outline of the path the sound follows. But there's more to a synth than that. Remember there are also ways to shape how a sound evolves over time? These next few items control how that happens. Typically you'll find one or more Low Frequency Oscillators (LFOs).
These produce a slow wobble, which can be connected to control the pitch of the oscillators, the cutoff of the filter or the volume (see my tutorial on wobble bass here 'Slow' means anything from a full wobble every second or two, to a steady whirr.

For vibrato - that opera singer gut jiggle effect - the wobble might be set up to happen a few times a second. For colour changes, really slow sweeps of the filter cutoff can sound great.
For volume changes, the wobble creates an effect called tremolo, where the sound fades in and out very quickly;
interesting, but not used that much. As with the standard oscillators, you can set the shape of the wobble using a very similar set of waveforms.
An interesting addition you'll often find here is a random waveform that changes regularly.
Routed to the filter cutoff, this creates a classic bubbly synth sound. Better synths have more than one LFO. Really good ones have two or three per note.

In the envelope

Apart from LFOs, you'll also find envelope generators. These produce a curve that 'plays' every time you hit a key.
The most popular sort of envelope generator is called an ADSR. The curve starts at zero, ramps up to full(Attack), ramps down to a fixed level (Decay), stays there as long as you hold the key (Sustain), and ramps down to zero when you let go (Release).

ADSRs are a good mix between complexity and sophistication. Routed to an oscillator they sweep the pitch up and down; again, more of an interesting effect than a useful one. Connected to a filter they open and close it, making that characteristic swept sound that synths are so good at. Connected to an amplifier, they control the
volume, creating notes that fade in and fade out slowly, or attack quickly and fade out slowly, or both attack and fade quickly.

More sophisticated synths have more complex envelopes, with lots of ramps and times and levels to play with.
Sometimes these can be set to loop so that when the envelope gets to the final release part of the cycle it starts from the attack again.

Finally, you'll find some way of controlling how the LFOs and envelopes are connected to the oscillator, filter, and amp.
Sometimes this is fixed - you get controls for each possible setting - but there's no way to (say) connect the LFO to the amplifier (find another synth). Sometimes there's some kind of internal connection system which lets you route things to
other things. This is obviously a better option, but it can take a while to get your head round it.

So, there is the basics. You'll find an oscillator, filter, amplifier and a basic envelope in every synth.

In better synths you get more of everything: more oscillators, more kinds of filter, more sophisticated amplifier options, lots of LFOs and envelopes and plenty of effects.

You have a synth, now would be a good time to see if you can work out how all this works in the real world. Why not get yourself a midi keyboard for hands on feel,
It adds different dimensions to your sound.

Vst Jargon


Here's a quick explanation for noobs over what certain paramiters achieve with your soft synths:

ADSR

The four stages of a sound's envelope: Attack, Decay, Sustain and Release.

Analogue

When referring to synthesis, analogue means 'old' in that most analogue synths still create and shape sound in the same way that the first synths, built in the 60s did.

Envelope

The shape of the 'cross-section' of a sound affecting its volume over time. This can be changed to alter the overall impact of any particular sound or to emulate "real" instruments.

Filter

Basically they 'clean up' a sound by restricting certain frequencies and allowing others to pass through.

Frequency

The pitch of a note which can be measure through electrical pulse in Hertz. The higher the frequency, the higher the note sounds in pitch.

LFO

Low Frequency Oscillator. Basically an oscillator which produces very low-frequency sounds (almost too low to be heard by the human ear. (Also a kick ass group on warp records, Go get there albums... now).

Oscillator

The very first stage in the process of creating sounds, the oscillator produces a raw sound which is basically a crude buzz.

Pitch

The position of a certain note or sound in the frequency scale. To say a sound is 'high in pitch' is the same as saying it has a high frequency.

Timbre


Difficult to accurately define, the timbre is the 'feel' of a sound, in terms of harshness or mellowness.

Tremolo

A wobble in the sound created by tiny fluctuations in volume.

Vibrato

A wobble, similar to tremolo, but with rapid changes in pitch rather than volume. (can be useful when used on a bass ;) )

Stylish drum programming


Now we're going to investigate various techniques for making programmed patterns sound more 'human', as well as looking at some short cuts to generating rhythm tracks with an apparently improvised feel. While the focus of our attention will be jazz patterns, the subtext is all about injecting the milk of human kindness into beat boxes in general. So even if you think that jazz is something musicians only do when they get too old to play music that people actually want to listen to, stay tuned.

On the face of it, jazz drum programming appears to be a contradiction in terms. Jazz music is supposed to be all about the spontaneous expression of heart and soul, while drum machines and sequencers are soulless machines, the very opposites of spontaneity, creativity and having a good laugh down the boozer after the gig. That was certainly true 10 years ago, when drum machines simply didn't have the technical facilities to compete with humans on a jazz tip. First, the sounds themselves were often not realistic enough to be appropriate for jazz (though, to be fair, this was more an attitude of mind than a valid technical issue). Second, and more importantly, early drum machines just didn't offer
"...thanks to cut and paste, you can quickly generate drum tracks which have an apparently improvised feel."
the necessary control over dynamics and quantisation which are necessary if you want to emulate the subtle nuances of a live drummer in full flow.

These days, there are no excuses. Armed with the most basic GM module/workstation and the humblest of computer sequencers, you can produce jazz patterns that not only sound convincing, but swing with the best of them. The only real limit to your creativity is your time. Sequencers and drum machines only put out what you put in. If you want to create a rhythm track based around the idea that each bar is different from the next, then you'll have to be prepared to program every single variation yourself. From my own experience, I know it can take many hours to recreate the kind of spontaneous-sounding jazz track that any drummer worth their salt could lay down in a single take. Be prepared.

TO ERR IS HUMAN

One question which is perhaps worth spending a few lines considering is what exactly differentiates a rhythm played by a human from one created by a machine. Setting aside the issue of sounds and ambience for the moment, can most people actually tell the difference between a recording featuring a real drummer and one driven by a beat box? It was probably easier to distinguish in the early days, when a combination of lazy programming and a lack of onboard memory meant that drum machines gave themselves away by undue repetition. The lack of control over dynamics also meant that drum machines really did sound like metronomes -- not so much because of the regularity of timing, but because of the total consistency of the sounds. What makes music 'human', on the other hand, is the minor inconsistencies in the playing, in terms of timing, dynamics and the variations inherent in acoustic instruments. There's also this ephemeral notion of 'interpretation' -- which can, perhaps, be defined as an ability to creatively bend the rules to enhance the emotional pleasure of the music. Or to put it another way, if it ain't got that swing, it don't mean a thing.

DYNAMIC DUELS


As I mentioned last month, dynamics (the relative MIDI velocity levels of the different instruments) are crucial to creating a sense of movement within any style of drum pattern. Creating convincing jazz patterns requires even more attention to detail in this matter. Obviously, the easiest way to achieve a human feel is simply to program your rhythms in real time, using a velocity-sensitive MIDI keyboard, drum pads or drum machine buttons. I'd recommend this as your standard approach with cymbal parts, which often provide the fluidity of movement within a rhythm. (In jazz, it's the ride cymbal which is the dominant time-keeping instrument, as opposed to the hi-hats). Most sequencers offer a mixture of pattern-based and linear recording, so it's easy enough to build up a basic track from a series of step-time created patterns, then go back and record a new 'live' cymbal line over the entire track. Try also setting the quantise function to a very fine resolution, or turning it off altogether. You can normally go back and correct any really wayward beats after the event, using the over-quantise function.

TIME, GENTLEMEN, TIME


What originally really used to get up people's noses about drum machines was the fact that they kept 'inhumanly' strict tempo -- a charge which is still levelled at sequenced music per se. There are two issues here. One is about variations in tempo across the whole track -- in other words, the fact that people naturally speed up and slow down during different bits of a song. There's no reason why sequenced music shouldn't also speed up and slow down, and thanks to the wonder of sequencer tempo maps it's very easy to build this kind of variation into a song. In fact, whatever the style of music, one trick is to nudge the tempo up by a couple of beats when you hit the chorus or playout, and take it down a few notches in the bridge from the introduction to the first verse, or the bridge from the middle eight to the next verse, and so on.

The second issue concerns the minuscule variations in timing that occur within a pattern. Here we're touching on a human foible known in drumming circles as playing behind or in front of the beat. The fact is that the majority of human drummers (and, for that matter, most other musicians) rarely hit the notes right on the button. Some will have a natural inclination to play slightly early, others will play slightly late; some can go back and forth as the music demands. Playing behind the beat will drag the song back and make the track sound slightly slower than it actually is. You notice this in a lot of slow blues and funk numbers, where often the whole band hits everything slightly late. Playing ahead of the beat gives the song real urgency, making it sound faster even though the tempo hasn't actually changed. Again, this is easily replicated on most sequencers (and some drum machines), which allow you to shift patterns or entire drum tracks by a specified number of MIDI ticks. It's worth experimenting with this function, particularly on the snare when you've got a regular beat on the two and the four. But don't overdo it, or your drummer will just sound out of time.

Some sequencers and drum machines take this a stage further, with intelligent quantise functions which alter the MIDI velocity of certain beats, while also shifting the timing of certain beats by tiny amounts. But whereas early applications of this function imposed the changes randomly, it's now based on more careful analysis of the rhythmic pulse of particular styles of music. Personally, I think these functions work best when they're applied sparingly -- for example, to a fill or particular drum phrase rather than across the entire track. (See the examples box for further discussion of this.) Otherwise the drumming just sounds wrong rather than 'human'.

TIMBRE LAND


As most people are aware, an acoustic drum doesn't just get louder when it's struck harder, it also changes timbre, rising in pitch and exhibiting more pitch-bend. Cymbals will also change timbre according to where they are struck on their surface, and also how rapidly they are played. Some drum machines and sound modules simulate this through multi-sampled voices which will change according to MIDI velocity. If a sampler is the source of your drum voices, you can also easily set up velocity-sensitive cross-fades between different pitches of the same sound or, indeed, different sounds.

A similar effect can be achieved with more humble equipment. For example, the standard GM kit offers a choice of two ride cymbals, plus a more 'clangy'-sounding ride 'bell'. As a matter of course, I would use at least two of these sounds within a jazz ride pattern, if not all three. It really does make a difference. Similarly, when programming two bass drum notes in quick succession, try using a softer, more rounded one for the first beat and a sharper, heavier sound for the second.

RANDOMISATION

So far, so good. But while technology may be on our side in terms of making individual patterns sound more human, I appreciate that not everyone has the time and patience to laboriously trawl through a drum track beat by beat, instrument by instrument, tinkering about with individual velocities, timing values and so on. However, thanks to the power of cut and paste, you can quickly generate drum tracks which have an apparently improvised feel.

The process starts with the creation of a 1- or 2-bar 'master' pattern. With a jazz track it might be the archetypal jazz cymbal rhythm, underpinned by a basic bass and snare figure. This is then copied to several pattern locations -- an easy enough job whether you're using a stand-alone drum machine or a computer-based seque
"Dynamics are crucial to creating a sense of movement within any drum pattern."
ncer. You then call up one of these copies and start deleting, adding or moving a couple of cymbal beats here, a couple of snares or basses there. Maybe just delete every fifth cymbal note -- whatever. The trick is not to think too hard about what you're doing, and for this reason I often work in step time, because then it's hard to second-guess the end result. What you should end up with is a family of 1-bar patterns, all based around the master rhythm, yet each one slightly different. When chaining these together to form the song, simply assemble them in a random order. Hence the first verse might consist of patterns 1/2/3/4, but the second would be 2/4/2/3, and so on. Again, don't try to second-guess the result. When played end to end, the finished rhythm track might sound a bit iffy, but once you've got the rest of the instruments in place the result should sound more coherent.

With a sequencer, applying this technique is even easier. For example, in the edit page of a program like Ableton Live / Logic you can easily sub-divide your master and variation patterns into smaller sections -- half-bars, or even quarter-bars, for instance, and then use these smaller building blocks to build up the complete drum track.

Once the other parts are in place, it's worth going back to the drum edit page and tweaking the patterns to better fit the structure of the track. For example, there might be places where the insertion of a crash cymbal would provide an accent or mark the division of a bar.

Et voila! What you now have is a rhythm track with a large element of unpredictability about it -- almost as good as a having a machine with its own mind!

N. Rowland

Introduction to mastering


As mastering engineer of the recording website, many people have asked me about the importance of mastering. However, in order to thoroughly describe the importance of mastering, I must first describe some of the equipment and processes available to a typical mastering engineer.

The equipment used by mastering engineers is very specialized and precise. Most people have dynamic compressors in their studios but the compressors used in mastering are a bit more complicated. For instance, I use compression that can control high and low frequencies independently. It can catch peaks in the audio signal instantly or before the peaks even occur. This compression uses joint stereo operation which means that if a peak occurs on one channel of the stereo mix, both channels (right and left audio channels) with be attenuated equally. This is important because if only one channel is attenuated, there will be a sudden loss in one channel's volume which will interfere with the soundscape. Joint stereo operation also prevents stereo separation from deteriorating as compression is increased.

Most people are also very familiar with equalizers or EQ. The EQ used in mastering can affect both right and left channels independently or identically. This is useful if the right and left channels have significantly different frequency content or if there is an error in one channel and not the other (if it ain't broke, don't fix it). Also, I can use EQ from a ten-band analogue EQ all the way to 2,400 band digital FFT filters. FFT means Fast Fourier Transform, which is a method of using a graphic display to control independent bands of frequencies. Why so many bands? Precision, that's why. I've mastered songs with high pitched ringing going on throughout caused by substandard equipment or from having a computer too close to the recording gear. Normal EQ could eliminate such sounds but would cause severe interference with the rest of the program material making it sound unnatural. The digital EQ is so precise that it can eliminate the ringing without any audible effect on the program material. It can also be used for split seconds to reduce bum notes or add a little accent to certain instruments without affecting the surrounding material. This is very useful for increasing clarity and overall impact of the sound.

Nonlinear editing tools such as a software controlled hard drive system are also important for removing sections of sound for the purpose of making different versions of songs for radio or album cuts, CD singles etc. Fixing bad "punch-in" glitches, and cleaning up fades are also advantages of nonlinear editing tools. The same tools are used to put the songs or other material in the correct order and set the correct timing between tracks on CDs. Dynamics can also be added with great precision to program material using a nonlinear editing system to increase the impact of the sound. One other real advantage of a nonlinear system is the ability to reduce transients (occasional sudden volume peaks), which prevent the overall volume of the material from being increased. After stray transients have been removed, the signal can usually be boosted 3-9dB louder than before.

Noise reduction is also a very handy tool in mastering. The same FFT filter used for EQ can also be used to remove AC hum, tape hiss (to a limited extent) or other unwanted noises such as clicks and pops. If there is noise in a particular track like AC hum, a segment of the track containing only noise can be sampled in the FFT as a profile for noise reduction. This profile is applied over the entire selection and (hopefully) attenuates the noise. This is incredibly useful for restoring older recordings, but many new projects I've worked on have also benefited from this process.

Mastering engineers also have the ability to widen the stereo field of recordings, even if they were originally recorded in mono. Granted, if you send a mono recording to a mastering house, they cannot, for instance, pan the guitar to the right and the keyboard to the left, but they can add stereo space that was not there originally. If the recording is done in stereo but just does not have the aural space it needs, then the stereo field can be accented, creating an improved soundscape. There are several methods of doing this that can only be done in the digital domain, but some methods are done using specialized analogue processors.

One of the last mastering tricks I should mention is time stretching. A song's tempo can be increased or decreased without affecting the pitch of the song. This is important for making radio edits of songs, as radio programmers have a tendency to speed up songs in order to fit more commercials into the day. The tempo of the song can be decreased so when the radio station speeds it up, it will have the tempo it was originally intended to have. There isn't a large demand for this process, but some people wanting to make their tunes more danceable or to cheat the radio stations like to have this option.

So when people ask me what the importance of mastering is, I could sum it up into just a few short statements. Mastering increases the impact and clarity of the material. It is the final polishing an album as a whole receives before it is released to the public. Final touches on fades, song order and volume are all made here as well as some correctional touch-ups.

Who should have their stuff mastered? Anybody looking for a more professional sound in their work should have their material mastered. Mastering is a key process in bringing recordings up to commercial standards. Home-recorded demos all the way to industrial studio recordings can benefit from mastering, which is why I stress the importance of it so much. Industrial studios have their material mastered religiously to gain that extra edge. Many audiophiles have their material mastered to compete with the industrial studios, and musicians with homemade demos may have it done just to increase the impact of their sound for promotional use. So mastering can serve anybody who is looking for a more professional sound in their music. For audiophiles, it is a great help for achieving the perfect sound. For industrial studios, it is a step all to important to skip.

Silent Bob

Friday, February 26, 2010

My top 10 Vst plugins


For any noob trying to get into computer music, I'll save you the hassle.
Though these are my own preference for music production.
Get yourself these weapons & you will be well on your way!

1. Native Instruments Massive.
2. Linplug Albino 3.
3. Hypersonic.
4. Edirol Home Orchestra.
5. Chameleon 5000.
6. Native Instruments Kontakt.
7. Native Instruments Pro-53.
8. Native Instruments Reaktor 5.
9. Native Instruments Absynth 4.
10. Novation Bass Station.

As you can tell, I like Native Instruments, In fact I don't think they have EVER made a bad program, Its the pro's choice and it should be yours!!

Compression tips


Basics

What is compression?
the reason people ask about compression is because they find it the hardest concept to understand or hear.
A basic explanation is to imagine compression like an automatic volume control, when the audio is loud it gets turned down and when it's low it gets turned up.
This means sharp signals are now curved and fading signals are now picked up and heard for longer. It also means smoother sounds and can add a lot more weight to your notes.


Knee's

Soft knees are generally used for everything from snares to vocals to final mixing,
Where as a hard knee compression is a lot more audiable and less smooth,
I tend to use hard knee compression for fattenning my basses.

Vocal compression

Vocals are one of the hardest and most dynamic sounds you may come across. My
advice would be to try and catch the peaks in the song. Use soft knee compression in your vst, set the ratio to around 2:1, attack to 0.09ms, release to 100ms then adjust the threshold to catch the loudest parts of the vocal, so you get about 8dB of reduction. (remember, Use this as a guideline).

Stereo low


Old skool engineers often use the trick of sub grouping the drums to a stereo pair then applying a stereo compressor to achieve a pumping sound.
Remember though the golden rule, What you have applied, You cant take away, So always back up your tracks.. even while writing.
Pretty much everything will sound better with a little compression , this includes the whole sonic spectrum from bass drums to jews harps.

Try and try again


Double compression


Instead of putting a whole sound through a compressor, a cool trick is to split it to two channels, heavily compress one of them and mix that with the uncompressed channel. This works particularly well on drum sounds and can
be applied to an individual snare drum or a stereo submix of the whole drum pattern (or some of its parts).
The compressed version of the sound can be tweaked to make it pump by setting an appropriately short release time and can then be added to the uncompressed version to get a more exciting and dynamic rhythm.

Multiband Compression

When working with a sound source which covers a full (or at least large) frequency spectrum, such as a complete mix, normal compressors tend to introduce a 'pumping' effect. This is because the lower frequencies which tend to trigger the compressor will normally be doing something quite different to the higher frequencies, yet the
compressor will attenuate the entire output by the same amount. Multiband compression, as the name suggests, uses a crossover to split the full-bandwidth input sound into smaller bandwidths which are then compressed separately.
The results are then mixed back together, the result being a much louder,tighter mix which doesn't pump or sound squashed, This makes for a thoroughly better sounding overall mix.


Hope you can learn from this, In another blog I will write how to use the king of electronic music production "Side-chain compression".
It will show you how to effectively "duck" a bassline to retain the power your tune needs.

Reverb tips


Here we will explain on how to effectively use reverb in your mixes.
Reverb is a powerful tool that can fill gaps but it should be used with care as not to completely drown out other instruments in your mix.

Diversify


Rather than trying to make everything in your mix in the same acoustic environment, why not use a couple of really diverse reverbs to add some strange depth to your track? A dry forward vocal works nicely with a 'drowned' string section or a small bright room setting on your drums.

Automation

Try automating return levels so that the reverb comes and goes in different sections of your tune. By tweaking the aux send levels during your mix you can add splashes of reverb on the fly to add interest to snares or vocal parts. (midi sync to a midi controller for bonus points & control).

Take your time

Spend time choosing or trying out different reverb vsts & styles, Different tunes need different sounds, Dont stick with the same fx in all your tracks.

preverb tricks

Reverse reverb is an old trick, where you can hear a vocal before a singer comes in, or a snare before it plays, This is in some vsts as "pre-verb".
I think this was originally invented by Jimmy Page on "Dazed & Confused".

Combinations


A combination of reverbs on things can be good. A short setting for the snap snare with a longer bright plate reverb can turn a lame snare into a more live sound.
Thus giving it way more size.

Reverse reverb


Reverse a sample, add reverb, then reverse your sample complete with reverb back around the right way
again. This way, the reverb trail leads up into the sample, instead of trailing away from it. This opens new doors for panning fx you might want to add & automate.

Reverb and bass

Usually, bass and reverb don't mix too well, unless you're specifically after a crappy sound. I'd avoid it with your bass notes.

Some good Reverb VSTS are Izotope Ozone 4 and Voxengo Pristine space, Worth checking out.

Vocal Microphone placement & Selecting your mic


Here i will discuss microphone placement techniques, This is a blog for computer music production, But vocals can always be cool. (As long as you don't kill auto-tune).

Microphones , for a recording engineer can be a task. The choice and use of
certain mics for recording vocals have a great influence over the detail of the sonic
picture the the producer wants to create.
Lead vocal recording is probably the most subjective and most variable area when it comes to microphone choice and placement. Vocal mics garner the most fame and notoriety because they play a huge part of the in the creation and realization of the ultimate vocal performance.

Because of their mystique and their unique sound, vintage condenser microphones have
gained tremendous respect.

A number of vintage condensers are worth a mention. The German-made Neumann condenser microphones remain widely popularized. The most popular Neumanns include the transistorized U87 and the earlier U67 and U47 tube microphones mostly used today.

The esoteric M49 and M50 are quite good for lead vocals , and Neumann's M149 tube model is a new, modern mic with the vintage heritage of the M49.

AKG from Austria is also very popular among producers.

Other good choices from AKG are: the C12A, C-414EB P48 or the C-414T LII.

However, it is not to say only condensers should be used for vocal recording. In certain circums tances , there is nothing like the immediacy and impact that the right dynamic microphone can impart to a lead vocalist's sound.

The Shure SM57 is my favorite mic though it is generally used for the miking of instruments.
Though I think the most widely used and best selling mike would be the Shure Sm58.
I have played countless gigs with a Shure Sm58 set up.

Vocal Mic Placement

Mic placement - particularly when using sensitive condensers - directly affects every aspect of the singer's sound and performance.

While there are no hard rules , ideally the singer needs to sing directly, i.e. on level with the
diaphragm of the mic.
Distance to the mic is extremely important because our ears relate distance to the intimacy
with the singer's voice and emotion: closer distances equate to a more intimate sound.

Off-level singing or changing distance causes a degradation in quality but is all part of "working the mic,"
which is part of a singer's on-mic sound. Experienced singers use these physics to enhance or colour the good and bad areas of their voice. A good singer will use slight distance changes for dramatic punctuation.

Working very close to the mic nearly always necessitates the use of a "pop filter" of some type to attenuate air blasts from the mouth. (A piece of cardboard in the way can do wonders too).

All cardioid microphones exhibit the "proximity" effect which boosts low frequencies
as the singer gets closer to the diaphragm. Singers can use this effect to achieve a larger, fatter tone.

In general, a good starting point mic placement is slightly higher than the vocalists mouth.
The mic is then aimed downward at the mouth with the exact distance at the singer's and producer's option.

Just don't use this info on the next "Top 10" phone ringtone tune i'll have to listen to on the bus.
Cheers!

General Equalisation Levels


Here I will explain general levels you can use during your writing and mastering process.
Using these general rules in your productions can really tighten up your sound and give your tracks room to "breath".

Sometimes during production you can write certain phrases or lines that you know should sound well together but they just do not seem correct when played together.

Obviously the lines that you are writing could be out of key when played together (I will talk about chord progression another time), But a lot of the time, Your selected sounds may not work together due to clashing in frequencies.

Below are several examples that you can use while eq'ing your instruments.
(Remember to always EQ your instruments seperatly rather just on your master channel).
These examples of frequencies can be used in hardware / software or any vst as the rules still apply.


(Clicky to enlarge)

How to make your kick drums boom


I find in quite a lot of dance music there seems to be a huge lacking in the bottom end and mid range of the kick's.

This is even quite prevalent in the popular dance music you hear on t.v & the radio.
A producer that I find really lacks in bass is Dj Basshunter.
Maybe he's called that because he hasn't found it yet?

Anyways, Here is a tutorial to make your kick's really boom in the clubs.

First off, Grab yourself a sample of the techno tried and tested classic:
The Roland 909 kick.

You can get it from here if you don't have one already.

Next up you want another tried & tested classic, The Roland 808 Kick.
The king of bass shakers used from everyone from the Beastie Boys to Aphex Twin.

You can get one here in this Roland TR-808 sample pack


Next up, In your DAW of choice, write yourself a pattern with your 909 kick sample.

Here i have made a simple 4 to the floor for ease of explanation.


Next up, You are going to want to clone the exact same pattern as your 909 kick but with the 808 kick instead like this.


So they are playing "on top" of each other at the same time.
Don't worry about the overlap of the 808 kick drum, This is going to give us our boom.
It should already be sounding pretty meaty, But lets make it more booming.

Next up we will grab ourselves a compressor, (I am using Live's built in for ease of explanation).
Drop your compressor onto your 808 & reduce the threshold to around 10% of the inputted sound. (remember to listen though, this is music and your ears are better than your eyes).


Now drop an equaliser vst onto the 808, Using your ears tweak the sound of your 808.
A good rule of thumb in production is the reduction of around 250hz in your eq vst,
This removes "mudiness" and tightens it up, It will also stop your kick's frequencies messing with other parts of your mix. (Frequency clashes can often cause "clipping" of sound).


Now play the 2 kicks together, You should have a pretty mighty kick going on.
Make sure that the levels of the 2 kicks match each other also.

Next you want to do the same with the 909 kick sample, Compression and EQ, Though I find myself if you can roll down the EQ around 275 - 290 Hz it generally sounds sweeter.

Now play the together & there you go!

Easy booming kick drums, This also leaves a lot of possibilities for individual tweaking until you find the sound you are looking for.

Achieving a heavy "wobble bass"


A lot of people it seem's online are having a hard time achieving a nice & nasty "Wobbling" bass for there productions.

This sound of the wobble has become popular with recent styles of music such as Dubstep & Drum & Bass, Hopefully with this tutorial we will get you shaking some nasty bottom end "wubs" in no time.

I find myself that the best way to build yourself a nasty wobble bass is from the ground up.
Don't worry about presets, What we are going to make here is far better and also created by yourself, So it opens a lot more doors for creativity in your own productions.

My own personal favorite weapon of choice for creating a bass shaking wobble is Native Instruments Massive.

For me this is the ultimate resource for not only creating huge bass but also ripping lead lines.
(Probably why it's called massive).

Start of in your D.A.W of choice (digital audio workstation).
I use Ableton Live personally.


Next up you are going to need some oscilations to give sound to your synth.
In the top right section go to OSC1, Make sure you click on the left so that it is green or "active".
Now choose your self a wave, I will be using a saw wave in this tutorial.
Now drop the pitch down to - 24. (Each number counts as a semi-tone).
Now mess around with the WT position knob to get yourself a fatish tone.


Next up we want more bass, This just isnt heavy enough.
Active osc2 so that its enabled.
Choose yourself a nice smooth square wave, This will add way more bottom end.
Once again, Mess with the WT control until you get a sound you like.
Also, Drop the Octaves once again to minus 24.
(Make sure you have AMP turned up or you will not hear it).


Next up we are going to add a filter to the sound, To remove frequencies and boost a few others.
Go the filter called "Daft".
Now you have selected this filter, You will notice a large change in the sound.
Mess around with the cutoff & resonance until you find a sound you like, I find the resonance adds a nice smooth level to the square wave, Cut off dirty's the sound up a bit.


When you have yourself a sound you like, Its time to start making some wobbles!
Go to the green section called "LFO", Click on the words LFO and then next to it is an arrowed crosshair, Drag the crosshair into the filter section in the empty square underneath the cutoff
as shown in the picture below.


Now you should start hearing your first wobbles, Move the crossfader curve up to the top to make sure the sound is not split.
Also on your left you have the "Rate" of your LFO, This controls the speed of your wobbles.
This can be assigned to a midi controller or automated by hand in your DAW.

Another option is you can go to the "sync" button and choose the rate of your LFO to be syncronized to your track.


You now have a perfectly good usable bass, Obviously this isn't as hugely fat as you want it yet,
But with a combination of distortions, Compressions and automation you can turn this sound you have made into something massive.

I'll be talking about FX you can use on this sound and production tips in later blogs.

Enjoy!